Lessons from the documents

The McDowell Farm in 1860

post by Susan London-Sherer, Historical Archaeology/Historic Preservation Graduate Intern

This was an exciting week at the Magnolia Valley site! Our “newbie” classmates joined us and provided the inspiration we needed to complete the survey portion of our field school. We finally reached the magic number of shovel tests we were striving for…300! That may seem like a very large number of holes, but the property is over 300 acres, and our holes are spread out all over this beautiful farm. Looking back now, I think we can all embrace the “practice makes perfect” attitude, and safely say that we have that skill in our tool bags.

We are also very excited to learn more about the ways that humans have used this land over time. Periodically, I will be updating everyone on what the historic documentation has to tell us about Magnolia Valley in the past. As the public historian for the site, my job is to carry two tool bags when I report for work. One contains my gloves, trowels, and mustache duct tape, while the other contains a subscription to Ancestry.com and a few paper passes that grant me access to the Rutherford County Clerk’s office and the Williamson County Archives.

There are a few basic skills that I have had to pick up along the way, in order to make sense of the land survey language in the property deeds. I spent some time researching land measurements, including the “pole,” a common unit of measure in 1800s land surveys. A pole is literally a wooden pole that is 16.5 feet long. When a measurement appears on a land survey in poles, as most of the deeds related to this property do, you simply multiply the number of poles by 16.5 to convert to feet. It is also necessary to know that one mile is equal to 5,280 feet, and one acre is equal to 43,560 square feet of area. There are exactly 640 acres in one square mile, and that was about the size of William and Jannett McDowell’s farm in 1860.

The deeds for the 650 acres of land, owned by William McDowell, show that he purchased the land in four transactions over the course of twenty-one years. His first purchase was 460 acres from James B. Russell on August 5, 1836. McDowell paid $7,000 for the property, or $15.22 per acre. The following year, on June 14, 1837, McDowell purchased a 33-acre tract of land from Rea Joice for $700, or $21.21 per acre. The third tract of land, 31.5 acres, was purchased on April 6, 1854 from Johnson Jordan and cost $737.50 or $23.41 per acre. The fourth tract of land, a 100-acre parcel, was purchased on October 20, 1857 from John T. Harris and Catharine B. Harris for $2,400, or $24.00 per acre.

Once I traced the deed trail back to the owner whose gravestone marks the sole burial in the family cemetery, I wanted to know more about how Mr. McDowell used his property, and what he produced on his farm. According to the Selected U.S. Federal Census Non-Population Schedules 1850-1880, the McDowell farm consisted of 450 “improved” acres and 200 “unimproved” acres. The cash value of the farm was $28,000, the value of the farm equipment was $1,000, and the value of the livestock on the farm was $10,933. The McDowell’s livestock consisted of: 26 horses, 57 asses and mules, 10 milk cows, 4 working oxen, 15 other cattle, 8 sheep, and 115 swine.

Working team of oxen.

Working team of oxen.

In 1860, the farm produced 100 bushels of wheat, 25 bushels of rye, 4000 bushels of Indian corn, and 20 bales of ginseed cotton, in bales of 400 lbs. apiece. According to the 1860 Schedule 2. Form of Slave Inhabitants, the McDowell’s housed 24 enslaved individuals on the farm in six slave houses, the remains of which we believe are now buried beneath a subdivision. On page 69 of this document, it is noted that Mr. McDowell’s enslaved consisted on 14 males and 10 females, which included 10 children under the age of 10 years old. Please continue to follow our blog to find out more about the intriguing story of Magnolia Valley.
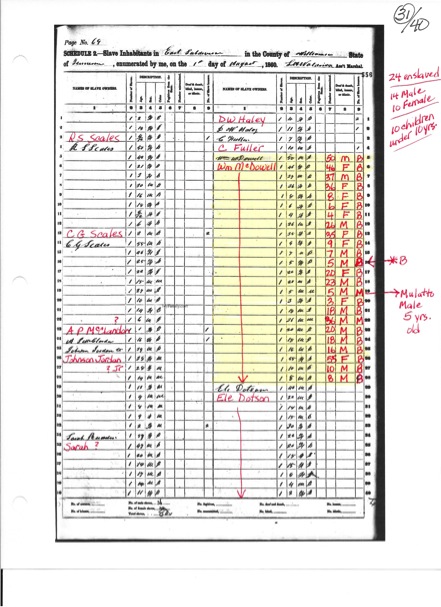
 

1860 Schedule 2. Slave Inhabitants – Highlighting William McDowell’s enslaved individuals. Courtesy of Ancestry.com.

1860 Schedule 2. Slave Inhabitants – Highlighting William McDowell’s enslaved individuals. Courtesy of Ancestry.com.


The importance of the hypotenuse

— post by Jesse Tune, Project Co-Director


Today is the day that many people have been waiting on – the start of actual excavations! The students were split into two crews: one crew of students worked on finishing up shovel tests in Area I, while the other crew headed back to Area A to setup the excavation grid and begin excavations.

The preliminary results of the geophysical survey in allow us to make an informed decision about exactly where in Area A we want to excavate. As a result, we need to carefully lay out the excavation grid exactly the same as the grid used for the geophysical survey. We also must take extra care to ensure that each 2 meter x 2 meter (6.56 ft. x 6.56 ft.) unit within the grid is a perfect square. It is important that each unit is exactly 2 meters x 2 meters so we can precisely document where every artifact and evidence of human activity is located. This process consists of using several long reel-tapes, countless pin flags, a bit of patience, and a little basic trigonometry.

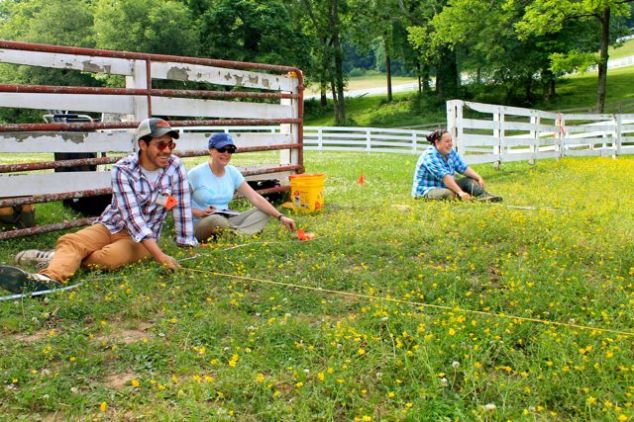
We start by using two tape measures to establish a south and east baseline. Two additional tape measures are then used to mark the west and north lines of the grid and create an 18 meter x 32 meter (59 ft. x 105 ft.) rectangle. However, simply because opposite sides of the rectangle are the same length does not mean that the excavation grid is set up with 2 x 2 meter square units. A diamond has opposite sides of equal length, but they do not meet in 90 degree corners; thus, not squared. This is where a little trigonometry comes in handy. Thanks to Pythagoras of Samos, we can quickly and easily determine if the corners of our grid are 90 degree angles, and thus if our grid is set up correctly.

Grid 1

The only time they are allowed to sit while working! Field school students (L to R: Nathan, Susan, Kelsey) hold down reel tapes and prepare pin flags for the excavation grid.


The Pythagorean Theorem says that A2 + B2 = C2, or essentially that if we add the square roots of two sides of a right triangle together, it will equal the square root of the hypotenuse. So we know that the distance between two opposite corners of our 18×32 meter grid should be exactly 36.715 meters.  By using Pythagoras’s simple equation to ensure that our grid is perfectly squared.

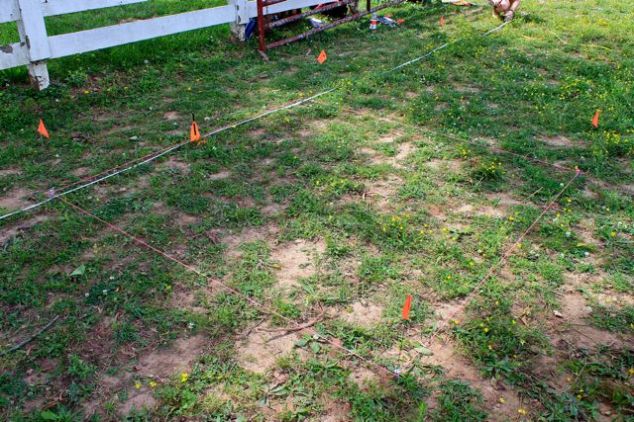
A perfectly square 2 meter x 2 meter unit. The orange pin flags mark the corners, the pink string outlines what will be the outside walls of this unit.

A perfectly square 2 meter x 2 meter unit. The orange pin flags mark the corners, the pink string outlines what will be the outside walls of this unit.

We are off to a great start to excavations and already have four 2 m x 2 m units down 10 centimeters (cm) (approx. 4 inches ) or more in depth. We should have at least a total of seven units in active excavation by Friday.

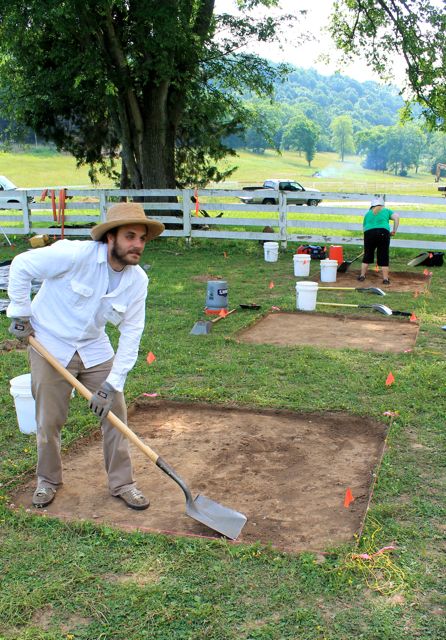
Three of the four 2 meter x 2 meter units in active excavation.

Three of the four 2 meter x 2 meter units in active excavation.


Learning about local Patriots of the American Revolution

posted by Dr. Peres, Jesse T., and Susan L.-S.

Something you should know about archaeologists is that they are always doing, writing, reading, and thinking about archaeology. Archaeology is a lifestyle, and not for those that prefer a punch-in/punch-out, 40-hour a week job. While the field school students are off enjoying some down time with family and friends, the Co-Directors, Jesse and myself, and Susan S. (Historic Preservation Graduate Intern), accompanied by members of our families, spent Sunday afternoon conducting research, meeting community members, learning more about the Euro-Americans that acquired the land we are working on via land grants, visiting the Wilson Cemetery on neighboring property, and honoring individuals that fought in the American Revolution.

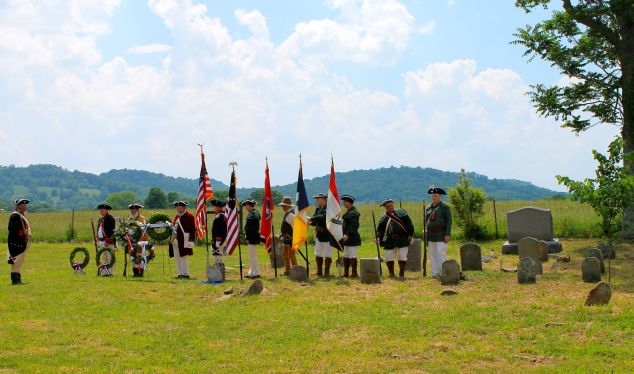
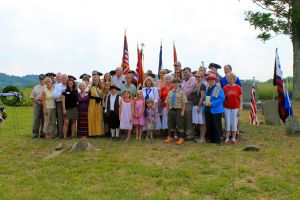
Members of the Sons of the American Revolution presenting the colors.

Members of the Sons of the American Revolution presenting the colors at the Wilson Cemetery.


Excerpt from my notes of the event:

Sunday, May 25, 2014

I (and J. and G. Lemons) met up with J. Tune, M. Tune, S. L.-S. (and daughter). We went to the neighboring property where the Daughters of the American Revolution (DAR) were holding a ceremony to place a marker at the grave of Zaccheus Wilson, a patriot of the Revolutionary War. We listened to a recounting of Zaccheus’s (and his mother, Eleanor’s) interactions with General Charles Cornwallis, for which he is named an American Patriot.


After the program we went to the Harpeth Lick Cumberland Presbyterian Church (built on property donated by one of the Wilson clan members in the 1800s) to meet the Wilson family members/descendants. Everyone we met was kind, friendly, and passionate about their family’s history, and very willing to share their knowledge.

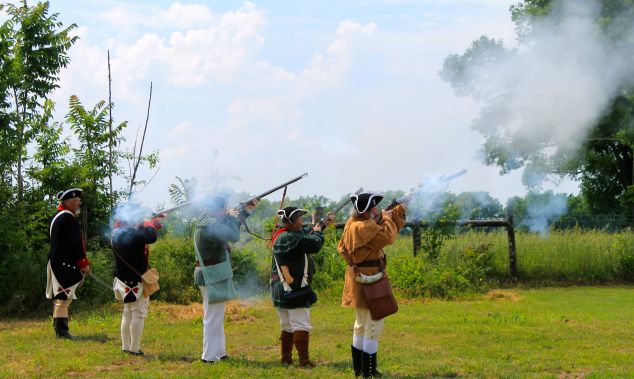
Gun salute in honor of Zaccheus Wilson.

Gun salute in honor of Zaccheus Wilson.

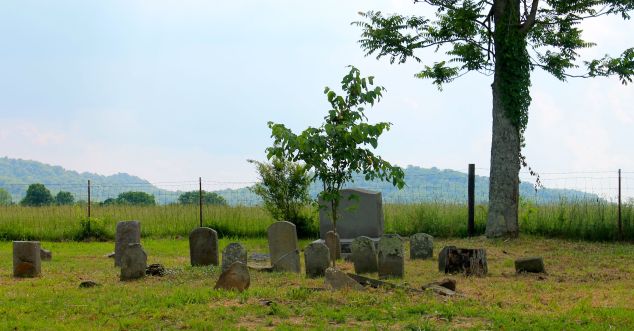
You might be wondering why we were interested in the Wilson Cemetery. We want to know how the original Wilson family members are related (or not) with the later William McDowell, his wife Janet, and her second husband William McMeekin. During Susan’s research into the historic period owners/occupants of the property we are working on, she found that Mrs. Janet McDowell re-married after W. McDowell’s death, and that it is possible she and her second husband are buried in the Wilson Cemetery. Unfortunately many of the tombstones are missing and those that are intact are highly eroded.

Wilson Cemetery in Rutherford County.

Wilson Cemetery in Rutherford County.

The recounting of some of the Wilson family history, researched, written, and presented by a descendent of Robert Wilson, suggests there were McDowells that lived in the area a full 100 years before our William McDowell. One of the earlier McDowells (Jane McDowell) married Robert Wilson and may be buried in another local cemetery.

How are they related? What happened to Janet McDowell after she married William McMeekin?

Where in Scotland did W. McDowell originate?

As you can see, the history of this property is intriguing and still has gaps to be filled. This is just one component to understanding ALL of the uses of the land and the lives of the people that lived here over several millennia. Something we all noted was how passionate the Wilson descendants about their family history and sharing that with their extended family and other interested community members.

Wilson descendants

Wilson family descendants present for the maker dedication to Zaccheus Wilson.

A stream, a snake, and a whole lotta’ nails!

posted by field school student Eric S.

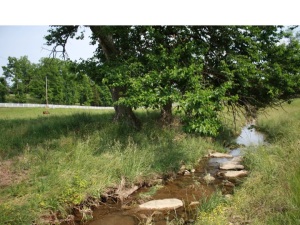
We continued on with the remote sensing survey, and this time moved to known areas of historic occupation. While collecting data near the spring-fed stream that runs through the property, the remote sensing crew discovered possible historic artifacts along the stream bottom and bank.

Spring-fed stream running through the property.

Spring-fed stream running through the property.

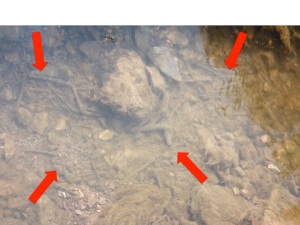
These included quite a few horseshoes, a large dump of nails, pieces to a field gate, a buckle to a horse harness, a metal shank button, and the bottom of a glass bottle that appears to date to the late 1800s. We collected these artifacts, recorded their locations, and will analyze them further to determine their functions and ages.

Red arrows point to clusters of metal artifacts in the stream.

Red arrows point to clusters of metal artifacts in the stream.


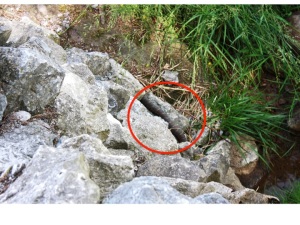
Furthermore, there are wooden poles or planks with nails driven into them lodged under the eroded embankment of the stream. It is possible that they were part of a wooden structure, possibly a bridge, fence, or gate. The findings provided some needed excitement for the day as did some occupied snake holes further downstream.

Red circle highlights the snake hanging out by the stream.

Red circle highlights the snake hanging out by the stream.

We ended the week on a high note and look forward to the addition of six new classmates/crew members. We have one more area to shovel test survey on this 300+ acre farm, and then excavations begin for real! The three day weekend before excavation will give us a much needed break to help us revitalize ourselves and come back with a strong and positive attitude.

Happy Memorial Day from RCARP!


245 Shovel Tests All in a Row

— by Dr. Peres

We are nearing the end of our second week of field school, which means we are nearing the end of our survey work. Survey work is an important, though labor-intensive, part of archaeology. It allows us to explore a site that has never before been excavated to learn more about how big and deep the deposits are. As of today we finished shovel testing in all areas but one — the last area is for tomorrow. Why do we choose to shovel test vs. other survey methods? Shovel tests are not too big which means less disturbance to any potential intact deposits, yet they are big enough to give us a good snapshot into what lies beneath the surface.

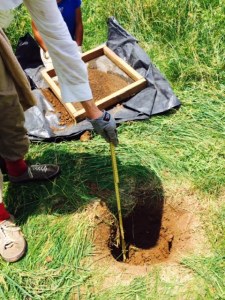
Measuring depth of shovel test after finding an artifact in the screen.

Measuring depth of shovel test after finding an artifact in the screen.

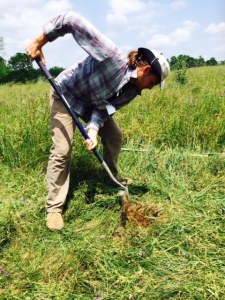
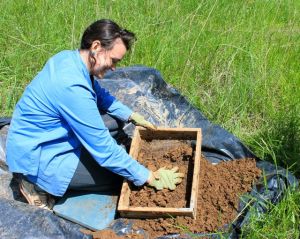
Digging shovel tests is part skill, part art form, part determination, and part brute force. Yes, any non-archaeologist can dig a round hole in the ground, but we do it in a very systematic manner. We dig some, screen the dirt, look for artifacts or other evidence of previous human occupation, and measure the depth if we find any. We have a minimum depth we must meet, which varies by site. We analyze the soils as we dig, noting the texture, major ingredients of the soil (sand, silt, clay), and the color. All of that information is recorded and at what depth any changes occurred.

Jesse Tune uses brute force to get through natural sandstone in the shovel test.

Jesse Tune uses brute force to get through natural sandstone in the shovel test.


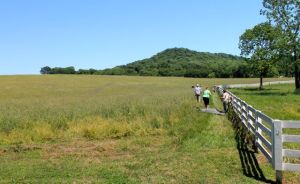
We space our shovel tests at regular intervals, typically 10 m (~33 ft.), 20 m (~66 ft.), or even 50 m (~164 ft.) apart. We place in them in straight lines parallel to one another, called transects.


Shovel test crews along the baseline (fence) before setting out on north-oriented transect lines (which is to the left in this picture).

Shovel test crews along the baseline (fence) before setting out on north-oriented transect lines (which is to the left in this picture).


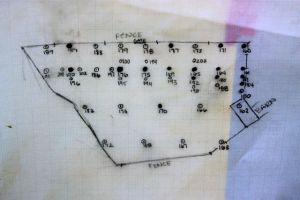
To keep track of where the shovel tests have been dug in relation to the landscape and one another, we draw field sketch maps (which always have important pieces of information like a North arrow, scale, key — those are just out of the frame of the picture here). We flag each shovel test with locational and inventory information so that Tim can come back and use a sub-meter GPS (read high degree of accuracy in locating them on the ground) to plot them in digitally.

Field sketch map of Area F. Filled in circles means the shovel test had some sort of artifact or other evidence for previous human occupation.

Field sketch map of Area F. Filled in circles means the shovel test had some sort of artifact or other evidence for previous human occupation.


Last, but certainly not least, our remote sensing crew worked super hard and finished up the field pictured below, and then some. Tomorrow we get to pick some places to survey “just for fun” to see what we can see. I am hoping for a potential historic period brick kiln!

GPR work in the last block of this field. Hooray!

GPR work in the last block of this field. Hooray!


Check back with us tomorrow as we wind up our second week and take a much needed and well deserved break over the three day holiday weekend!

Just another day at field school

posted by Dr. Peres


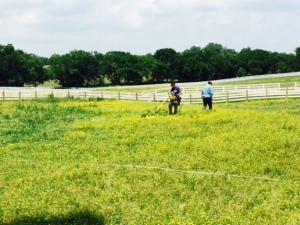
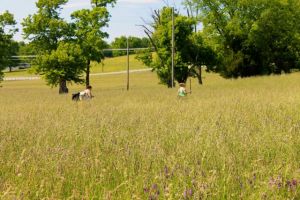
The shovel testing and remote sensing survey continued in various parts of the property. We were very happy to finish up Area G and move onto the northern part of Area F. Well, happy may be too strong of a word. It was great to make progress – we exceeded our goal for total number of shovel tests excavated today – but Area F had some pretty tall flora to wade through.


Tall grass

Kelsey and Megan trek through the elbow-high grass on a transect.


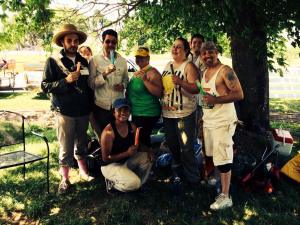
Part-way through the afternoon between Areas, we had a small water/shade/popsicle break. No matter how old you are, a popsicle can make life a little bit better.


Popsicles help us keep our cool on hot days.

Popsicles help us keep our cool on hot days.


We also had our first official visitors on site today! We were to be visited by archaeologists from the Tennessee Division of Archaeology (DoA). Visiting us today were Mike Moore (State Archaeologist, DoA) and Aaron Deter-Wolf (Prehistoric Archaeologist, DoA). Jesse and I showed them around the various areas of interest and Tim gave them a summary of some of the more interesting anomalies showing up in the geophysical survey data.


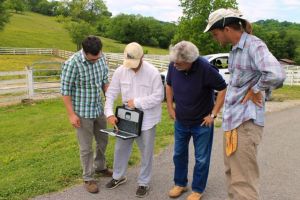
Tim gives a summary of the remote sensing survey to date. L to R: Aaron Deter-Wolf, Tim DeSmet, Mike Moore, Jesse Tune.

Tim gives a summary of the remote sensing survey to date. L to R: Aaron Deter-Wolf, Tim DeSmet, Mike Moore, Jesse Tune.


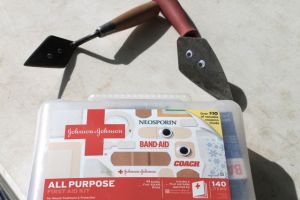
And last but not least, we were visited by the Google-y eye fairy last night. The crew had a fun time finding the google eyes in various locations. Something tells me we haven’t seen the last of them!


Small sample of what the Google-y eyed monster left behind (my favorite is the first aid kit).

Small sample of what the Google-y eyed monster left behind (my favorite is the first aid kit).


A Motley crew

post by field school student Sara N.

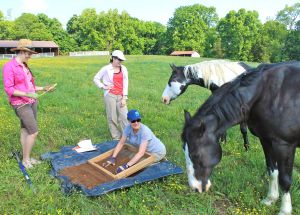
Our plan today was to shovel test in an area the west of where we had been working. This area sits up higher in elevation, and has the added bonus of having horses in the field! We established a baseline for our transects along the existing fence line. My partner and I were on the southern-most transect and on our second shovel test of the day. We had just removed the grass and began screening the first few shovelfuls when my partner picked up a distinct object from the screen. The object in question happened to be the distal half of a very old stone tool.  We showed it to Jesse Tune and Dr. Peres for confirmation (and because, well, we were all excited!).

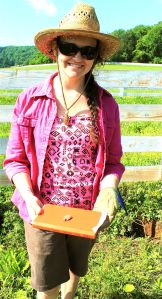
Sara N. holds the Motley PPK.

Sara N. holds the Motley PPK.


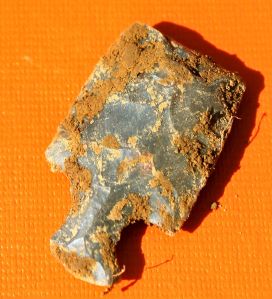
Jesse is a lithics specialist and identified it as a Motley type. These types of PPKs (Projectile Points/Knives) were made and used between 4,000 and 3,500 years ago.


Motley point.

Motley point.


What were they used for? Well, in any number of different ways — as a knife, scraper, hunting (spear point), or defense.


While this artifact was recovered from a shovel test – which is just a small snapshot into the site – Jesse and Dr. Peres think this signals the likelihood there is an intact site…the only way to know for sure is additional testing. Stay tuned over the next 5 1/2 weeks as we explore the Magnolia Valley site!


Today’s comic relief: Sara and Susan have an audience!


Susan and horses

What a GLEY day

student blog post by Kelsey C.

There is truth to the old adage “you learn something new everyday.” Today was a day for learning about soil (and making a new friend!).

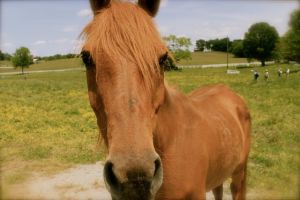
Pretty girl who was both curious and shy.

Pretty girl who was both curious and shy.


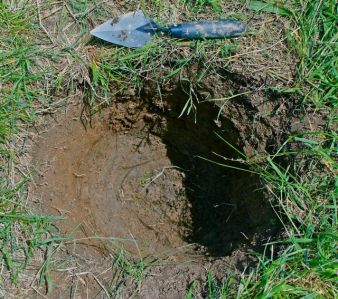
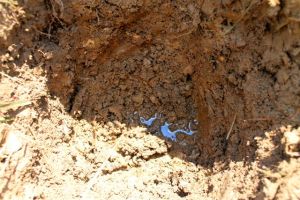
As my partner and I began yet another shovel test in Area F, we did not expect anything to be really different from what we had seen in other areas — basic brown soils with some possible chunky chert inclusions. Once we reached below 25 cmbs (centimeters below surface) we noticed a distinct mottling of soil colors. The shovel test terminated at 60 cmbs, and by this depth the soil was a complete gley (interestingly, if you Google search “gley” most of the sites that are listed are from England, Scotland, and Wales — is that really any surprise?).


Shovel test with gley soil in the bottom. Trowel is indicating North.

Shovel test with gley soil in the bottom. Trowel is indicating North.

What is gley?  Gley is a soil layer that is formed by the layering out of silicates from the upper clay layer. The gley is an aneorbic environment, and a dark grey green in color.  In non-technical terms: gley is a lot like cool damp Play-doh.

These different layers tell us about the moisture patterns of the soils. As in the 26-40 cmbs layer (Bt2), there is mostly clay, but as water rises and falls underground, there is a redox reaction within the soil. The iron and manganese that are in the soil are being eroded and can be seen in darker (black/dark orange) clusters. The gley is also being drawn into this layer (from below) through the rise and fall of the water. The deepest layer we encountered was a solid gley and registered a Gley Chart 1 3/1 (dark greenish gray on the Munsell Soil Chart).

This particular shovel test had the most diverse layering that we have seen thus far in our survey. To see these distinctive layers and to learn about how they formed and what the mean was really very cool!


Kelsey C. working on her blog post at the end of the day.

Kelsey C. working on her blog post at the end of the day.

Mama told me there would be days like this!

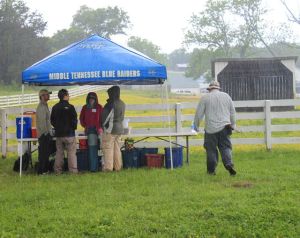
What a change from earlier in the week. Monday and Tuesday topped out in the low 90s. Today never made it out of the 50s! It was a welcome break from the heat, though we did get rained on throughout the day.

rainy


Remote sensing crew and field assistants huddle under the MTSU Blue Raider tent during one of the momentary downpours.


Magnolia Valley received well over 8 inches of rain yesterday — judging by the overflowing rain gauge on the property. We headed into the field knowing the grass would be wet and the soils saturated. We didn’t know several of our Shovel Tests would be written off due to standing water!

water in the hole

 The survey crew spent all day in Area E — a gently sloping part of the valley. We      had 26 total shovel tests to excavate there today, which isn’t that many to a     seasoned survey crew, but proved an interesting learning experience for the students. Screening wet silty loam is not a big deal, but once that loam transitions to clay, well, it is like trying to push wet play-doh through a kitchen colander. Not many artifacts were recovered from this area, which means we will likely not come back here when we start actual excavations.

Shovel Test with standing water.

screening clay


MTSU Anthropology major Sara N., screening very wet clay soil.


Today we had our first formal visitors to the field school! Dr. Mark Byrnes, Dean of Liberal Arts, and Dr. Karen Petersen, Associate Dean of Liberal Arts at MTSU drove out from campus to check out how our first week is progressing. I was happy to report that we have completed shovel testing in two main areas of interest and collected remote sensing data on a large chunk of a high priority area.


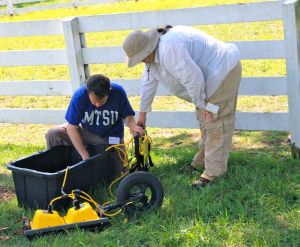
GPRMTSU Geosciences majors prepare the GPR for data collection.

Meet the Archaeologists, Part III

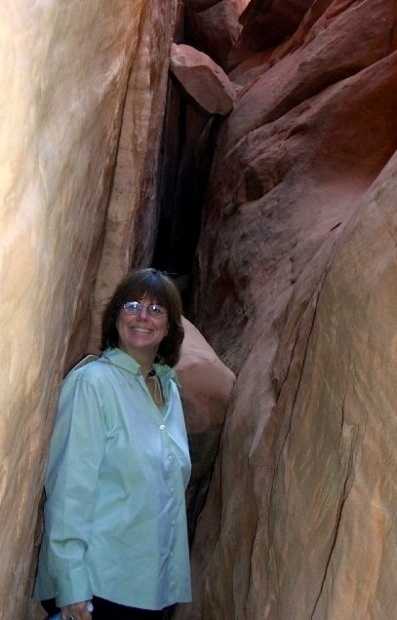
MTSU RCARP is very fortunate to have a passionate and talented Public Outreach Coordinator, Laura Bartel, who also happens to be a well-traveled and experienced archaeologist. 

Image

Laura Bartel exploring Arches National Park.

Laura received her M.A. in Anthropology from San Diego State University in 1983. Her interests and experience include prehistoric and historic archaeology, bioanthropology, public archaeology, and forensic anthropology. She considers the focus on bio-cultural-environmental interactions as prime in most areas of research.

Her husband’s career has necessitated many moves, so before arriving here in middle Tennessee in 2010, Laura resided and worked in California, North Carolina, Florida, and Colorado. Laura has taught anthropology and archaeology courses at several colleges and universities in the West and Southeast, including San Diego Mesa College, University of North Carolina- Greensboro, Elon University, and Florida Gulf Coast University. She has also taught college courses on Strategies for Academic Success and truly enjoys mentoring students.

Her undergraduate fieldwork began in 1977 as the “bone person” for excavations and research at a 4th century AD Roman site in northeastern Serbia. She has since conducted archaeological fieldwork and research at prehistoric and historic sites in California, North Carolina, Florida, and Colorado. Laura also has experience in cultural resource management, and while a graduate student, she was a CRM archaeologist for the state of California Department of Transportation, San Diego office. 

While on the faculty of Florida Gulf Coast University, in 2003, Laura was the co-director of the archaeological field school, held at the Thomas Edison-Henry Ford Winter Estates property in Fort Myers, Florida. She developed a public archaeology program to be held during the field school, including giving lectures and site tours for the public. Public archaeology, and the public’s perception of anthropology in general, is something that she is very passionate about. One of her goals is to get the citizens of Rutherford County aware and excited about the wealth of information regarding our county’s earliest inhabitants.

Most recently, Laura assisted in salvage fieldwork at the Black Cat Cave research project of Rutherford County, Drs. Tanya Peres and Shannon Hodge, Directors, and will be doing lab work on skeletal materials  recovered  from that project, as well as her own independent research. She has also been an osteology instructor for MTSU’s CSI camp, a judge for MTSU’s Forensic Institute for Research and Education high school forensic competition, as well as participated in forensic skeletal recovery with Dr. Hugh Berryman and the FASR team of the Forensic Institute for Research and Education.